April 12, 2013

how to hide Files And Folders With Command Promt.


 hide Files and Folders with Command promt. If you have any personal or confidential data in your PC and you don't wanna let other to peep it. then this trick will be very helpful to you.

So lets get started with it.

For instance: Say you have a folder with name "Photos" which is stored in drive " D " and you think strangers should not see this folder then to hide that folder do the followings. 

STEPS : 


Press Windows key + Run , Run command will appear.
In that type cmd and press enter. 

This will open Command prompt
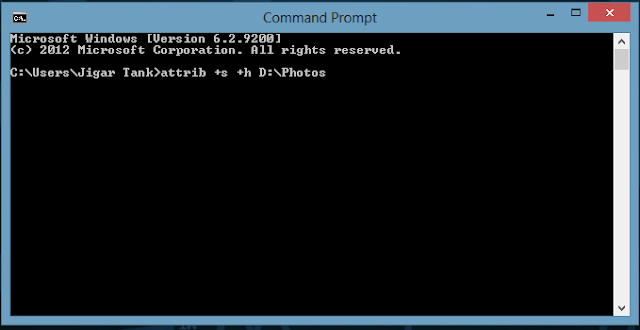
Now Type 

"attrib +s +h D:\Photos"
then press enter. 

Thais it your folder is now hidden, if not then there will be some mistake done by you. (you will have to change the directory accordingly.

once hidden it cannot be viewed by any search option.) 

Once hidden, now you want to unhide it again, simply use the same command but replace '+' with '-' on both flags 's' and 'h' (For eg : "attrib -s -h D:\Photos" ) 


I believe this tutorial will help you a lot,
create password protected Folders without software.


Securing personal files/software cannot be guaranteed in a situation whereby more than one person is permitted to a make use of a computer.

In this case,it is very necessary to ensure all sensitive/personal documents are kept hidden from the view of such users.
But how can you do that without a software?

Well,here's an easy way to it.
So,if you think there's a file/folder you'd like to keep hidden from the reach of others,just follow the steps below.


How To Secure Files/Folders Without Software

Create a new folder and create a new ‘Text Document’ in it by right-clicking and selecting ‘New’ » ‘Text document’.
Copy - Paste the following code snippet in the text document


cls @ECHO OFF title Folder Private if EXIST "Control Panel.{21EC2020-3AEA-1069-A2DD-08002B30309D}" goto UNLOCK if NOT EXIST Private goto MDLOCKER :CONFIRM echo Are you sure you want tolock the folder(Y/N) set/p "cho=>" if %cho%==Y goto LOCK if %cho%==y goto LOCK if %cho%==n goto END if %cho%==N goto END echo Invalid choice. goto CONFIRM :LOCK ren Private "Control Panel.{21EC2020-3AEA-1069-A2DD-08002B30309D}" attrib +h +s "Control Panel.{21EC2020-3AEA-1069-A2DD-08002B30309D}" echo Folder locked goto End :UNLOCK echo Enter password to unlockfolder set/p "pass=>" if NOT %pass%== password here goto FAIL attrib -h -s "Control Panel.{21EC2020-3AEA-1069-A2DD-08002B30309D}" ren "Control Panel.{21EC2020-3AEA-1069-A2DD-08002B30309D}" Private echo Folder Unlocked successfully goto End :FAIL echo Invalid password goto end :MDLOCKER md Private echo Private created successfully goto End :End


Locate `Password here` in the code above and change it to whatever password you want to use (Simple to remember,but hard for others to guess)


Now click on File » Save as and give it any name you so desire but with a .bat extension.
E.g : Lock.bat


Now,exit notepad and on getting to the new folder you created previously, you'll see a "LOCKER" command.


Double-click on this file and a new folder will appear (Private OR Confidential)
Now,copy/move all you want to hide in this “Private/Confidential” folder and go back one step.
Double-click on the "LOCKER" command again and you'll be greeted with something new.
Just press 'Y' as instructed and hit enter.


Immediately,the ‘PRIVATE / CONFIDENTIAL’ folder will disappear.Now,all your files & documents are secured in this hidden folder.


To undo hiding,double-click on this “Locker” command again and input the password you used above. Hit Enter and the hidden folder will re-appear..Now,that's it.

NOTE ↓:
These files can still be sometimes accessed using the search,so it is highly recommended you rename your files before hiding them so as to ensure its maximum security.

Reset your Forgotten Password In Windows

 How to Reset your Forgotten Password In Windows. Often People Tend To Forget their Password of Their Windows Password.
Forgetting any password is not fun, but luckily Here is the simple trick which i will show you to Reset your Forgotten Password.

REQUIREMENTS :
1. Windows Installation Disk.
2. A simple Command Line.

Follow Below Simple Steps :

Step 1: Insert Your windows disk And Boot Your PC.

Step 2:  Select " Repair Your Computer " From the lover Left Corner. Check the below Pic.


Step 3: Follow on Till you get the below screen , You need to click on Command Promt.


Step 4: Now The Real Trick,Type The below Command to backup the original Sticky keys File. 
copy c:\windows\system32\sethc.exe c:\


Step 5: Now Copy The Command Prompt Executable on top of the sticky keys executable :

copy c:\windows\system32\cmd.exe c:\windows\system32\sethc.exe


Follow The below Pic For More Idea on It.


Step 6: Now Reboot Your PC.

Step 7: After Rebooting your pc, You will see a login Screen, All You need to do is Hit Shift Key 5 Times, You will get a Command Promt.

Step 8 : Now to Reset Your Password just replace The Username and passoword with your own In Below line.

net user Freak MyNewPassword


Thats all Now you can Login.

you probably want to put the original sethc.exe file Back, Then You have to just reboot into the installation CD, Open the Command Promt Again and Copy The
c:\sethc.exe file back to 
c:\windows\system32\sethc.exe.

Blue Screen Error

Blue Screen = The Most Irritating Error Face by Windows Users. Did you ever got stuck with this type of Error ?
Most of will answer it YES.

What is Blue Screen of Death (BSOD) ?

Blue screen of death is nothing but an error Shown in Microsoft Windows Operating Systems which Stops Further Operations.

Why BSOD Error is Caused ?

This error is Generally Hardware or Drivers Related.causing the Computer To stop Responding And prevents Damage to the Hardware And data.
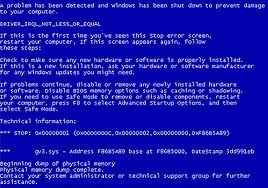
BSOD Looks Like the Below Picture. Manny Windows Users Must be Familiar With This.


Img src= google


How To Fix BSOD :
As I said There are several Reasons For BSOD, Unfortunately There is no Particular solution but The Following Tips And tricks Can Help you To get Rid Of it.


1. Remove Startup Programs That Starts Will System Booting.

What happens is when you System Boots, Many Other apps try To load at the same time whill may result in to BSOD. so Remove Unwanted Programs On startup.

How To Remove :
Press Windows Key +R
Run Box will appear. Type "msconfig" and Hit Enter,

Click on Startup Tab and remove all Unwanted Programs and click on apply.
It may ask you to restart your syste, So restart it .


Removing programs at startup will fix your problem.

2.Uninstall Softwares:
Many Times while installing a softare A blue screen occors with a message that says, The Software that you are installing is Culprit . Verify all the changes that you made to your system and reset Them. Uninstall the installed Application it will help you to a great extent.

3. Resetting your Hardwares And Drivers :
In some cases Due to Faulty Hardware connection it show the blue error screen. You can prevent this by ensuring you all hardware connection such as external ports,motherboard pins are set correctly.Bad drivers may also cause the same problem.Keep your drivers up to date.

 Above tips will definately help you to get rid of Bluescreens.


Windows 8 users May have Experienced a New Blue screen:
In windows 8 it will Tell you About the error and sad Emoticon At the top of the text .

April 11, 2013

உங்கள் இணைய வேகத்தை அதிகரிக்க your internet speed


கணணியில் இருந்து Mozilla Firefox மூலம் இணைய உலா வருபவர்களுக்கு
இணைய உலா வேகத்தினை அதிகரித்துக் கொள்வதற்கு இது ஒரு பயனுள்ள பதிவு


Mozilla Firefox மூலம் இணைய உலா வரும் பயனர்கள் உங்கள் உலாவியில் ஒரு சிறிய Tweak Network Add-on நிறுவி அதில் ஒரு சில மாற்றங்கள் செய்வதன் மூலம் உங்கள் இணைய உலா வேகத்தினை அதிகரித்துக் கொள்ளலாம்..
இதன் மூலம் ஒரு சிறப்பான இணைய உலா அனுபவத்தினையும் நீங்கள் பெற்றுக் கொள்ளலாம்


பின்வரும் வழிமுறைகளை பின்பற்றுவதன் மூலம் Mozilla Firefoxல் உங்கள் இணைய வேகத்தினை அதிகரித்து ஒரு சிறப்பாக இணைய உலா அனுபவத்தை பெறலாம் 

1.கீழே உள்ள தரவிரக்க சுட்டியை சொடுக்கி Tweak Network Add-on தரவிறக்கி உங்கள் கணணியில் நிறுவிக் கொள்ளுங்கள் 

(தரவிறக்க  சுட்டியை அழுத்தியதும் Firefox இன் மேல் சட்டத்தில் வரும் மஞ்சள் நிற பட்டியில் Allow உள்ள என்னும் பட்டனை அழுத்தியவுடன் Install செய்யும்படி கேட்கும் Install எனும் 
பட்டனை அழுத்தி Install செய்து கொள்ளலாம்)


2.பின் உங்கள் Firefox உலாவியினை Restart செய்து கொள்ளுங்கள்

3.அடுத்து உங்கள் உலாவியில் TOOL மெனு சென்று Tweek Network Setting என்பதை அழுத்துங்கள்


அழுத்தியவுடன் வரும் Tweek Network Setting சாளரத்தில்,


  • pipelining 
  • proxy pipelining  என்பதற்கு முன்னால் உள்ள பெட்டிகளில் சரி அடையாளத்தை இடவும்
  • பின் POWER எனும் பட்டனை அழுத்தவும்

பின் சாளரத்தில் உள்ள APPLY , OK என்பதை அழுத்தி சேவ் செய்து கொள்ளுங்கள்


இனி நீங்கள் Firefox  ஊடாக உலாவுகையில் முன் இருந்ததை விட வேகம் அதிகரித்திருப்பதனை உணரலாம்..


Android Mobile Phone இன் வேகத்தினை அதிகரிப்பதற்கு


Android Mobile Phone வழியாக இணையத்தை பயன்படுத்துபவர்கள் தற்போது அதிகரித்துள்ளது. தொடர்ந்து இணையத்தைப் பயன்படுத்தும் போது அதன் History மற்றும் Cookies தேங்கிக் காணப்படும். ஆகவே அதனை உடனுக்குடன் நீக்குவதன்
மூலம் இணைய வேகத்தைக் கூட்ட முடியும். Memoryஐ சுத்தபடுத்தும் நூற்றுக்கும் மேற்பட்ட அப்ளிக்கேஷன்கள் இலவசமாகவே கிடைக்கின்றன.
தேவையில்லாமல் இயங்கும் மென்பொருள்களை நிறுத்தி, சுத்தபடுத்தி, மொபைலை வேகப்படுத்தும் பயனுள்ள அருமையான மிக சிறந்த அப்ளிக்கேஷன் பற்றி பார்ப்போம். கணினியில் சிறப்பாக செயல்பட்டு கணினியை வேகப்படுத்தும் Advance System Care தற்போது மொபைல் போன்களுக்காக Advanced Mobile Care என்ற பெயரில் இலவசமாக கிடைக்கிறது.
Download link:
https://play.google.com/store/apps/details?id=com.iobit.mobilecare&feature=search_result#?t=W251bGwsMSwxLDEsImNvbS5pb2JpdC5tb2JpbGVjYXJlIl0
சுத்தபடுத்தும் வேலை மட்டுமல்லாது Game Booster, Battery Server, Application Manager மற்றும் அவசியமான (Privacy Locker) போட்டோ, வீடியோ, பைல்களை மறைத்து வைக்க என்று பல்வேறு வசதிகளை கொண்டுள்ளது. Android Mobile Phone வைத்திருப்பவர்கள் அவசியம் பயன்படுத்த வேண்டிய மென்பொருளாகும்
மேலுள்ள Screen shots களினைப் பார்க்கும் போதே அதன் பயன்பாடுகள் பற்றி உங்களுக்கு புரிந்திருக்கும். உங்கள் Android Mobile Phone இல் இதனை நிறுவிக் கூடிய பயனைப் பெற்றுக்கொள்ளுங்கள்.

More than 100 Keyboard Shortcuts: Keyboard Shortcuts (Microsoft Windows)


More than 100 Keyboard Shortcuts:
Keyboard Shorcuts (Microsoft Windows)
1. CTRL+C (Copy)
2. CTRL+X (Cut)
3. CTRL+V (Paste)
4. CTRL+Z (Undo)
5. DELETE (Delete)
6. SHIFT+DELETE (Delete the selected item permanently without placing the item in the Recycle Bin)
7. CTRL while dragging an item (Copy the selected item)
8. CTRL+SHIFT while dragging an item (Create a shortcut to the selected item)
9. F2 key (Rename the selected item)
10. CTRL+RIGHT ARROW (Move the insertion point to the beginning of the next word)
11. CTRL+LEFT ARROW (Move the insertion point to the beginning of the previous word)
12. CTRL+DOWN ARROW (Move the insertion point to the beginning of the next paragraph)
13. CTRL+UP ARROW (Move the insertion point to the beginning of the previous paragraph)
14. CTRL+SHIFT with any of the arrow keys (Highlight a block of text)
SHIFT with any of the arrow keys (Select more than one item in a window or on the desktop, or select text in a document)
15. CTRL+A (Select all)
16. F3 key (Search for a file or a folder)
17. ALT+ENTER (View the properties for the selected item)
18. ALT+F4 (Close the active item, or quit the active program)
19. ALT+ENTER (Display the properties of the selected object)
20. ALT+SPACEBAR (Open the shortcut menu for the active window)
21. CTRL+F4 (Close the active document in programs that enable you to have multiple documents opensimultaneou sly)
22. ALT+TAB (Switch between the open items)
23. ALT+ESC (Cycle through items in the order that they had been opened)
24. F6 key (Cycle through the screen elements in a window or on the desktop)
25. F4 key (Display the Address bar list in My Computer or Windows Explorer)
26. SHIFT+F10 (Display the shortcut menu for the selected item)
27. ALT+SPACEBAR (Display the System menu for the active window)
28. CTRL+ESC (Display the Start menu)
29. ALT+Underlined letter in a menu name (Display the corresponding menu) Underlined letter in a command name on an open menu (Perform the corresponding command)
30. F10 key (Activate the menu bar in the active program)
31. RIGHT ARROW (Open the next menu to the right, or open a submenu)
32. LEFT ARROW (Open the next menu to the left, or close a submenu)
33. F5 key (Update the active window)
34. BACKSPACE (View the folder onelevel up in My Computer or Windows Explorer)
35. ESC (Cancel the current task)
36. SHIFT when you insert a CD-ROMinto the CD-ROM drive (Prevent the CD-ROM from automatically playing)
Dialog Box - Keyboard Shortcuts
1. CTRL+TAB (Move forward through the tabs)
2. CTRL+SHIFT+TAB (Move backward through the tabs)
3. TAB (Move forward through the options)
4. SHIFT+TAB (Move backward through the options)
5. ALT+Underlined letter (Perform the corresponding command or select the corresponding option)
6. ENTER (Perform the command for the active option or button)
7. SPACEBAR (Select or clear the check box if the active option is a check box)
8. Arrow keys (Select a button if the active option is a group of option buttons)
9. F1 key (Display Help)
10. F4 key (Display the items in the active list)
11. BACKSPACE (Open a folder one level up if a folder is selected in the Save As or Open dialog box)

Microsoft Natural Keyboard Shortcuts
1. Windows Logo (Display or hide the Start menu)
2. Windows Logo+BREAK (Display the System Properties dialog box)
3. Windows Logo+D (Display the desktop)
4. Windows Logo+M (Minimize all of the windows)
5. Windows Logo+SHIFT+M (Restorethe minimized windows)
6. Windows Logo+E (Open My Computer)
7. Windows Logo+F (Search for a file or a folder)
8. CTRL+Windows Logo+F (Search for computers)
9. Windows Logo+F1 (Display Windows Help)
10. Windows Logo+ L (Lock the keyboard)
11. Windows Logo+R (Open the Run dialog box)
12. Windows Logo+U (Open Utility Manager)
13. Accessibility Keyboard Shortcuts
14. Right SHIFT for eight seconds (Switch FilterKeys either on or off)
15. Left ALT+left SHIFT+PRINT SCREEN (Switch High Contrast either on or off)
16. Left ALT+left SHIFT+NUM LOCK (Switch the MouseKeys either on or off)
17. SHIFT five times (Switch the StickyKeys either on or off)
18. NUM LOCK for five seconds (Switch the ToggleKeys either on or off)
19. Windows Logo +U (Open Utility Manager)
20. Windows Explorer Keyboard Shortcuts
21. END (Display the bottom of the active window)
22. HOME (Display the top of the active window)
23. NUM LOCK+Asterisk sign (*) (Display all of the subfolders that are under the selected folder)
24. NUM LOCK+Plus sign (+) (Display the contents of the selected folder)
25. NUM LOCK+Minus sign (-) (Collapse the selected folder)
26. LEFT ARROW (Collapse the current selection if it is expanded, or select the parent folder)
27. RIGHT ARROW (Display the current selection if it is collapsed, or select the first subfolder)
Shortcut Keys for Character Map
After you double-click a character on the grid of characters, you can move through the grid by using the keyboard shortcuts:
1. RIGHT ARROW (Move to the rightor to the beginning of the next line)
2. LEFT ARROW (Move to the left orto the end of the previous line)
3. UP ARROW (Move up one row)
4. DOWN ARROW (Move down one row)
5. PAGE UP (Move up one screen at a time)
6. PAGE DOWN (Move down one screen at a time)
7. HOME (Move to the beginning of the line)
8. END (Move to the end of the line)
9. CTRL+HOME (Move to the first character)
10. CTRL+END (Move to the last character)
11. SPACEBAR (Switch between Enlarged and Normal mode when a character is selected)
Microsoft Management Console (MMC)
Main Window Keyboard Shortcuts
1. CTRL+O (Open a saved console)
2. CTRL+N (Open a new console)
3. CTRL+S (Save the open console)
4. CTRL+M (Add or remove a console item)
5. CTRL+W (Open a new window)
6. F5 key (Update the content of all console windows)
7. ALT+SPACEBAR (Display the MMC window menu)
8. ALT+F4 (Close the console)
9. ALT+A (Display the Action menu)
10. ALT+V (Display the View menu)
11. ALT+F (Display the File menu)
12. ALT+O (Display the Favorites menu)

MMC Console Window Keyboard Shortcuts
1. CTRL+P (Print the current page or active pane)
2. ALT+Minus sign (-) (Display the window menu for the active console window)
3. SHIFT+F10 (Display the Action shortcut menu for the selected item)
4. F1 key (Open the Help topic, if any, for the selected item)
5. F5 key (Update the content of all console windows)
6. CTRL+F10 (Maximize the active console window)
7. CTRL+F5 (Restore the active console window)
8. ALT+ENTER (Display the Properties dialog box, if any, for theselected item)
9. F2 key (Rename the selected item)
10. CTRL+F4 (Close the active console window. When a console has only one console window, this shortcut closes the console)
Remote Desktop Connection Navigation
1. CTRL+ALT+END (Open the Microsoft Windows NT Security dialog box)
2. ALT+PAGE UP (Switch between programs from left to right)
3. ALT+PAGE DOWN (Switch between programs from right to left)
4. ALT+INSERT (Cycle through the programs in most recently used order)
5. ALT+HOME (Display the Start menu)
6. CTRL+ALT+BREAK (Switch the client computer between a window and a full screen)
7. ALT+DELETE (Display the Windows menu)
8. CTRL+ALT+Minus sign (-) (Place a snapshot of the active window in the client on the Terminal server clipboard and provide the same functionality as pressing PRINT SCREEN on a local computer.)
9. CTRL+ALT+Plus sign (+) (Place asnapshot of the entire client window area on the Terminal server clipboardand provide the same functionality aspressing ALT+PRINT SCREEN on a local computer.)

Microsoft Internet Explorer Keyboard Shortcuts
1. CTRL+B (Open the Organize Favorites dialog box)
2. CTRL+E (Open the Search bar)
3. CTRL+F (Start the Find utility)
4. CTRL+H (Open the History bar)
5. CTRL+I (Open the Favorites bar)
6. CTRL+L (Open the Open dialog box)
7. CTRL+N (Start another instance of the browser with the same Web address)
8. CTRL+O (Open the Open dialog box,the same as CTRL+L)
9. CTRL+P (Open the Print dialog box)
10. CTRL+R (Update the current Web )

April 9, 2013

Hide any Local Drive using Command prompt

Today Computer World tutorial is about how to hide a local drive without any 3rd party software. There are lots of free and payable software's available to hide local drive, but I'm not gonna talk about hide a local drive using a software. In this tutorial I'll show you an easiest way to hide local drive without using software. This will save your both money and time.

There are 3 methods available to hide a local drive without using any software

1. Hide a drive through gpedit
2. Hide a drive through regedit
3. Hide a drive using command prompt


Today we are covering command prompt way of doing it. So lets see how to do.


How to Hide any Local Drive using Command prompt

How to Hide a Local Drive using command prompt?

1. Click on Start - Run

2. In Run box type cmd and hit Enter. Now Command Prompt window will appear.

3. In command prompt, type diskpart and hit Enter.

4. Then type list volume and hit Enter.

Now it will display the list of all your computer drives details.


5. Then type the Drive Letter which you want to hide.
If you want to hide volume E, type select volume E and hit Enter.

Now follow mentioned massage will appear to you.
Volume 4 is the selected volume


How to Hide any Local Drive using Command prompt


6. After that, type remove letter E and hit an Enter. 

That's all, you have done. Now restart your computer once. When you start your PC again, you want be able to see the
 particular drive in My Computer.


How to get back Hidden Drive again in My Computer.

Do the procedure which i have mentioned in step 1,2,3,4 and 5 again.

Click Start --> Run --> cmd -->

Then type diskpart - list volume - select volume E

After that type assign letter E and hit Enter.

That's all !! You have got back the hidden local drive. Once again restart your PC, now you will be able to see hidden local drive in My Computer.