Block Diagrams

DDR2 DIMMs are not designed to be backward compatible with DDR DIMMs. The notch on DDR2 DIMMs is in a different position from DDR DIMMs, and the pin density is higher than DDR DIMMs in desktops. DDR2 is a 240-pin module, DDR is a 184-pin module. Notebooks have 200-pin modules for DDR and DDR2, however the notch on DDR modules is in a slightly different position than that on DDR2 modules.
Higher performance DDR2 DIMMs are compatible with lower performance DDR2 DIMMs; however, the higher performance module runs at the lower module's frequency. Using lower performing DDR2 memory in a system capable of higher performance results in the bus running at the rate of the lowest performance memory in use; however, in many systems this performance hit can be mitigated to a small extent by setting the timings of the memory to a lower latency setting.
Zotac has put an interesting spin on Nvidia's ION graphics by being the first company to offer a user-upgradeable solution. In doing so, Zotac's ION Upgrade Kits consist of a small form factor motherboard and ION graphics card.
"Zotac believes performance and compatibility should never be sacrificed for value. With the Zotac ION Upgrade Kits, you can have a premium computing experience complete with high-definition video playback, image editing, and video processing in a value package," said Carsten Berger, marketing director, Zotac International.
Available in mini-ITX and mini-DTX flavors, the Upgrade Kits' graphics cards slip into a PCI-E x1 slot, serving up 16 unified shaders and 512MB of DDR3 memory. The graphics card boasts support for Cuda, PureVidoe HD technologies, DirectX 10.1, DirectCompute, OpenGL, and OpenCL. Other specs include a 589MHz engine clock, 790MHz memory clockspeed, 1402MHz shader clock, and a 64-bit memory interface.
No word yet on price or availability.
Kingston on Monday it has developed the fastest Intel-certified memory in the world. The company's referring to its HyperX dual-channel DDR3 memory kit rated at 2400MHz, and a quick glance at Newegg shows that it trumps anything else available, just barely edging out
Kingston's newest kit boats 9-11-9-27-2N timings at 1.65V, a smidgen tighter than G.Skill's PIS Series DDR3-2400 kit, which checks in at 9-11-9-28-2N. Unlike the G.Skill kit, however, Kingston's DIMMs join select company on Intel's list of certified RAM for Core i7 processors, having been certified for use on Gigabyte's GA-P55A-UD4P. If a certification list is the sort of thing that matters to you, then it's probably worth noting that the next fastest kit on the list is Corsair's DDR3-2333 memory.
"As will all Kingston memory, the 2400MHz kit was created with the highest design-engineering principles and subjected to OEM-quality production and testing standards to gain Intel XMP certification," Kingston said.
Look for this kit to be available sometime in Q2. No word yet on price.
The proven solution to securely obliterate partition data.
Getting rid of an old PC, upgrading to a new hard drive, returning a leased computer, or redeploying a PC within your company? It is truly imperative to completely destroy all data from the old partitions.
Your sensitive data is too easily recovered if you rely on the standard delete function, formatting or even repartitioning your hard disk. Unidentified copies of those files could exist in "unused" parts of your hard drive, or in your Swap file, among other possible locations. Your discarded hard disk contains your personal information. Identity thieves know most people don't know how to correctly erase hard drive data before giving their hard disks away. So the thieves can target personal information on discarded hard disks and use it to steal your identity. EASEUS Partition Master can cover the data with zeroes patterns, making it unreadable by data recovery software.
| Ways to Try to Erase Hard Drive Data | Is the Data Truly Gone? |
| Simply Delete the File | No |
| Empty the Recycle Bin | No |
| Format the Hard Drive | No |
| Repartition the Hard Drive | No |
| Use EASEUS Partition Master | Yes! |
Wipe partition can erase the data on the partition completely and ensure that the data cannot be recovered by any data recovery solution. This function can prevent undesired recovery of your deleted data.You can execute this function by delete partition function.
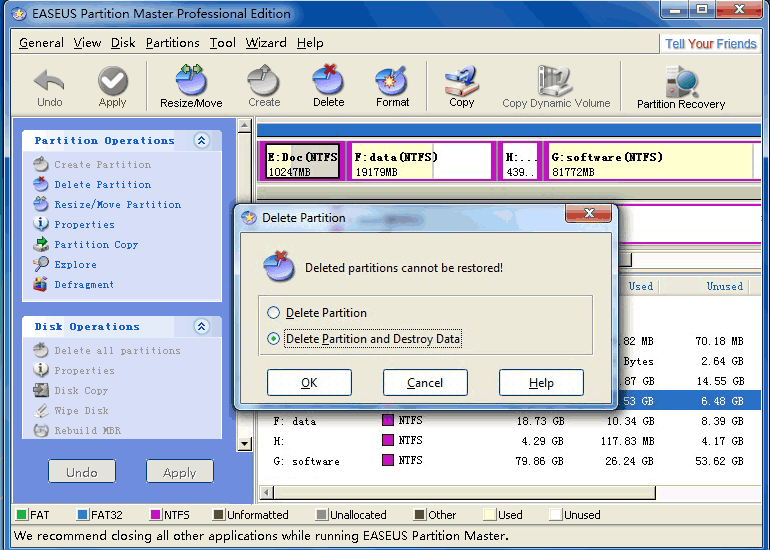
There are two types to delete partition, "Delete Partition" & "Delete Partition and Destroy Data", if you choose "Delete Partition", it just delete the partition. If you choose "Delete Partition and Destroy Data", the sector of the partition will be filled with "0" and the data cannot be recovered any longer.
The wipe operation cannot be undone. Even if you cancel while starting the wipe operation, the partition also will be destroyed. So please be careful!
Delete partition with/without wipe data on it.
Ensure your privacy security when upgrade to new hard disk.
Extremely easy to use, just two clicks away from success.
EASEUS Partition Master Home Edition is a world-wide popular freeware for its simplicity and potent features. Now, the newest version has been integrated the powerful . Its versatile features covers . You can do almost anything to your hard disk with EASEUS Partition Master Home Edition and it's 100% FREE!
Notes: there is only module, you can quickly recover files from deleted and lost partitions, but if you want to recover deleted files or files on formatted partition, you have to run "Full Scan". As the program will scan entire hard disk, so it would take longer time.
| Efficiency | Home Edition | Commercial Edition | |
| Recover data from deleted or lost partitions | Speed | Quick | Quick |
| Convenience | Easy | Easy | |
| Recover data from formatted, RAW or corrupted partition | Speed | Slow | Quick |
| Convenience | Hard | Easy | |
| Recover deleted files | Speed | Slow | Quick |
| Convenience | Hard | Easy | |
Before recovery, have a clear idea of your lost files location. If your files are on lost partitions, please follow the steps in section 1 to recover. If your files are on existing/formatted/RAW/corrupted partitions, please skip to section 2.
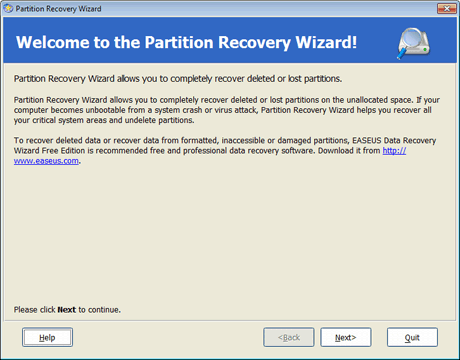
1. Run EASEUS Partition Master Home Edition, click "Wizard" > "Partition Recovery Wizard".
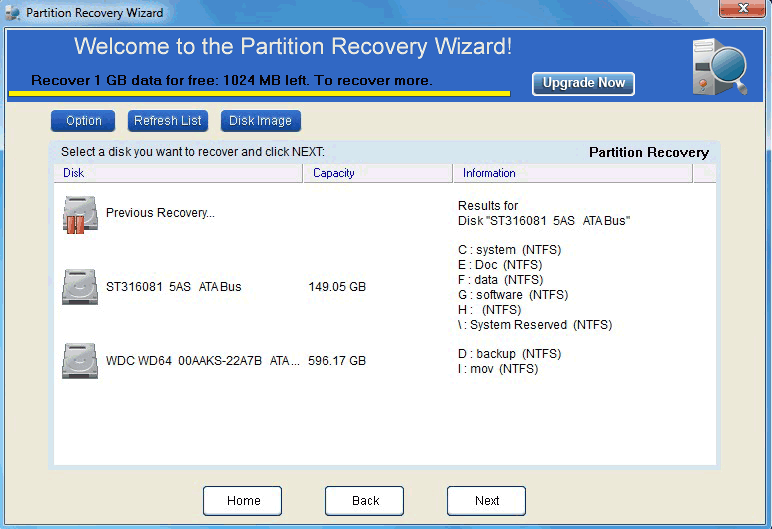
2. Run "Partition Recovery" module, where you'll find all the hard disks and all partitions in each hard disk. Choose the disk on which the lost or resized partition are located and click "Next".
Tips: If the volume does not have a drive letter, it will be displayed as "*".
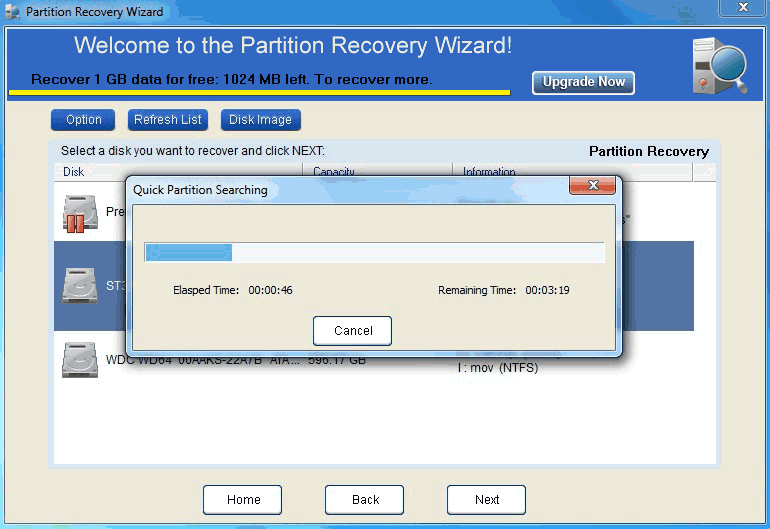
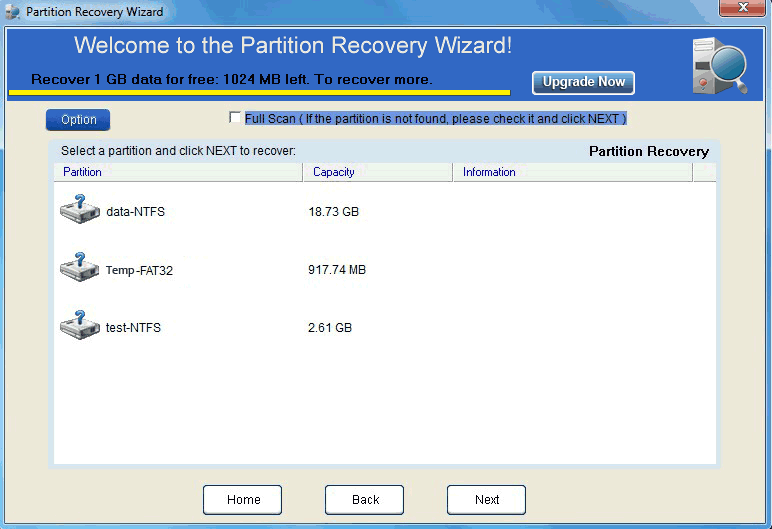
3. EASEUS Partition Master will start Quick Partition Search to scan the hard disk and will present a list of lost partitions. If there is no lost partition, Intelligent Search starts automatically.
4. Choose the lost partition and click "Next", if your lost partition is not found, please check the "Full scan" and click "Next" to scan the entire disk again.
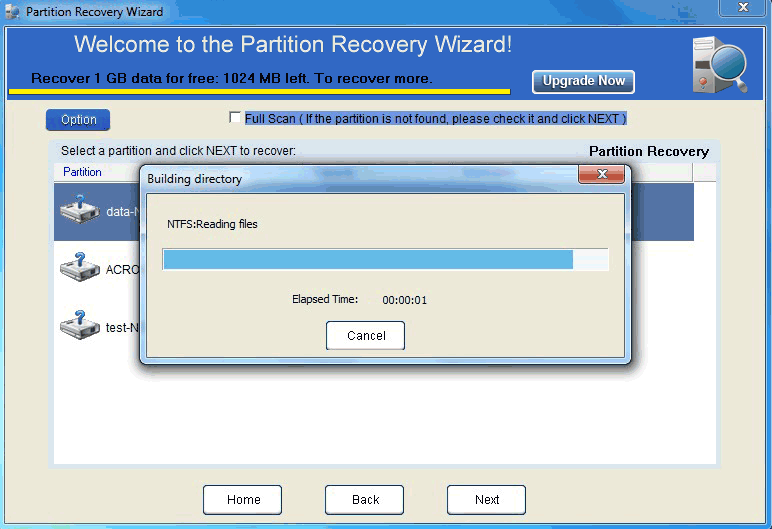
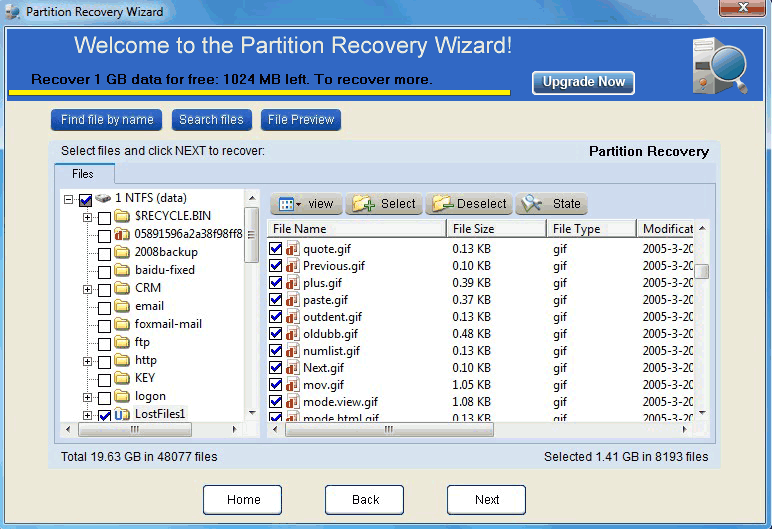
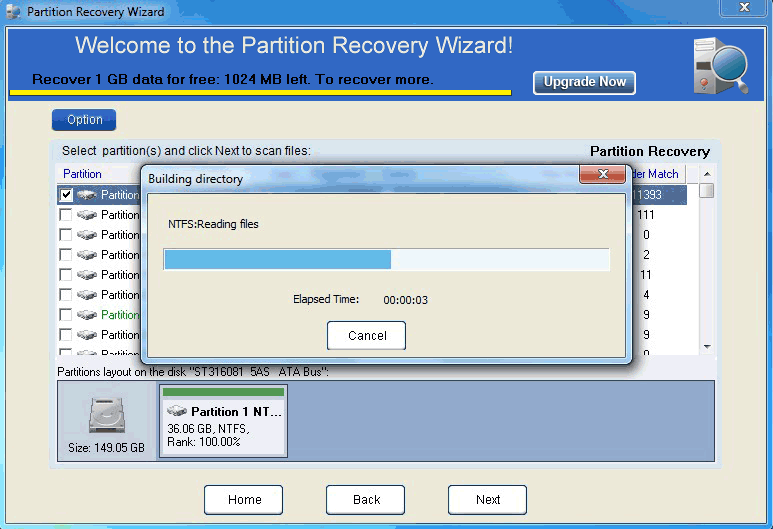
5. After building directory, you'll find all files on the lost partition.
6. Choose the files or folders to recover.
1. Run EASEUS Partition Master Home Edition, click "Wizard" > "Partition Recovery Wizard".
2. Run "Partition Recovery" module, where you'll find all the hard disks and all partitions in each hard disk. Choose the disk on which the lost or resized partition are located and click "Next".
3. EASEUS Partition Master will start Quick Partition Search to scan the hard disk and will present a list of lost partitions. If there is no lost partitions, Intelligent Search starts automatically.
4. If any lost partition is found, don't choose the lost partition listed below, because your lost files are not in the lost partitions, Click the "Full Scan" to start Intelligent Search manually.
If no lost partition is found, the wizard will skip to the next step automatically.
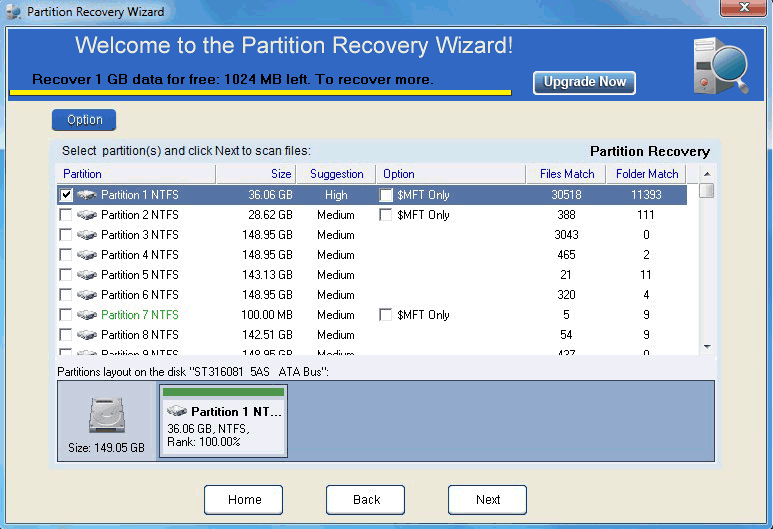
5. After search, all the lost and existing partitions are listed below, choose the one containing your lost files according to its capacity, Files Match, File System. Click "Next" to continue.
After building directory, you'll find all files on the partition.
6. Choose the files or folders to recover.